

This page describes how to use GUIs (dashboard) for tenant management.
Login
Same as normal login. If a group user logs in, the user is navigated to the group dashboard. When a tenant user logs in, the user is navigated to the tenant dashboard.
Tenant Dashboard
The user's login name (email address), tenant ID and the AWS account are displayed.

Account information
Account information is displayed.

You can change email address and password here.
Tenant screen
Click the row of each tenant to open the screen of that tenant. 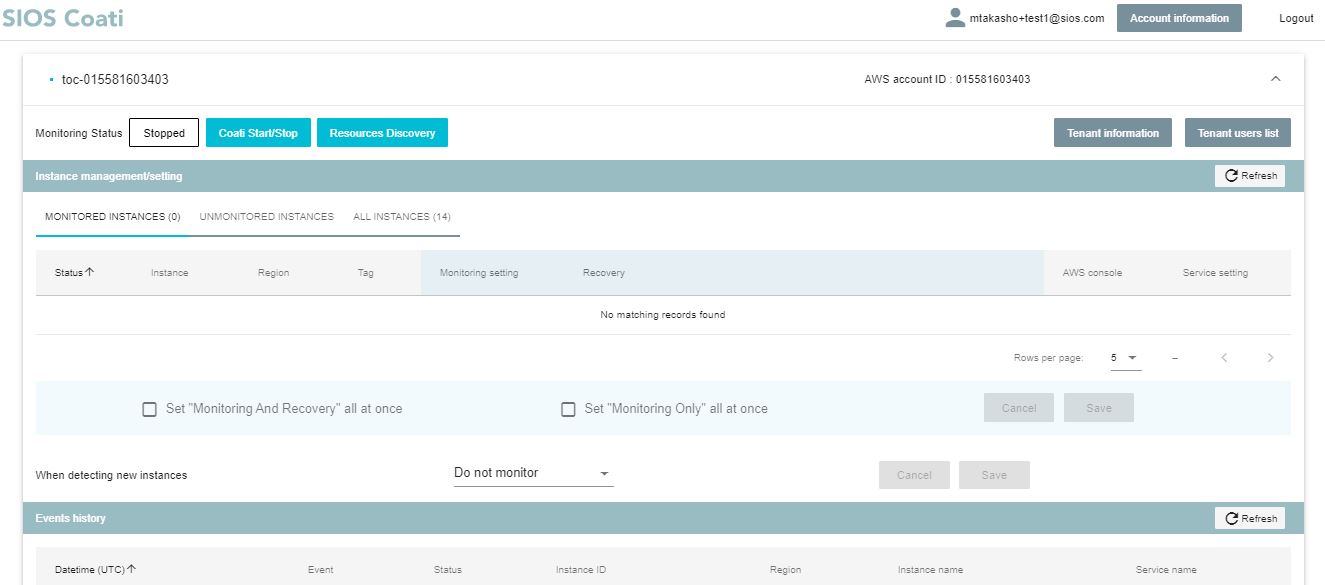
Tenant information
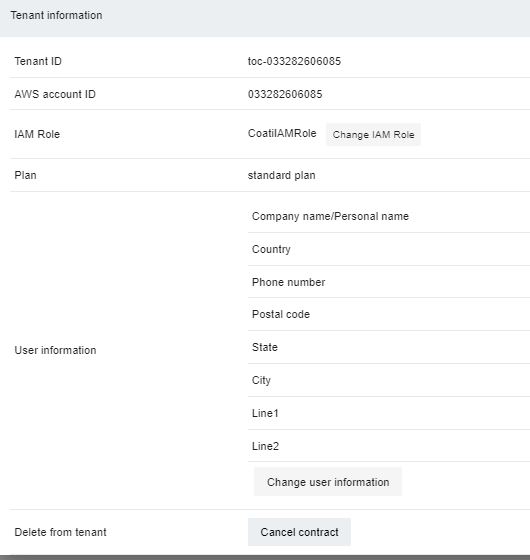
Displays the registered IAM role name, plan name and user information.
You will be removed from the tenant when clicking “Cancel contract” button.
On Standard Plan, cancelleration will be effective at the end of your current billing period.
Important: Cancelleration is NOT cancelled.
Tenant user list
Displays the list of tenant users.
You can set permissions and add/delete users to the tenant here.
Important: You need to have the privileges for each operation.
Support Helpdesk button
Go to the Support Helpdesk page.
Instance management screen section
You can check and set the instance and monitor the service in the instance. For details, please see “Instance Management” in How to Use GUI and Configurations.
Event history screen section
You can view the event history here. For details, please see “Dashboard – Event History” in How to Use GUI and Configurations.
Notification setting section
You can set notifications when an event occurs. For details, please see “Notification Settings – Event History” in How to Use GUI and Configurations.
Group Dashboard
A list of tenant in the group is displayed.

Account information button
Account information is displayed.
You can change email address and password here.

Group Information button
Account information is displayed
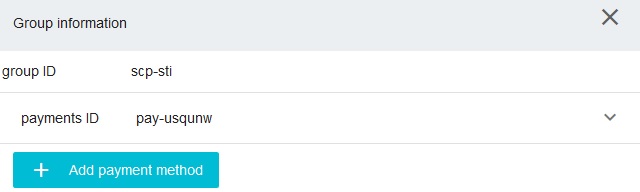
You can change email address and password here.
Group user list button
A list of group users is displayed. 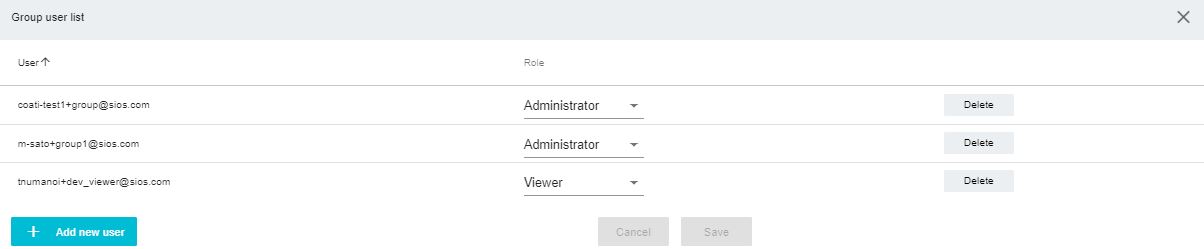
You can set permissions and add/remove users to/from the tenant here.
Tenant configuration button
Click the “Settings” button on each tenant row to open the tenant setting page. 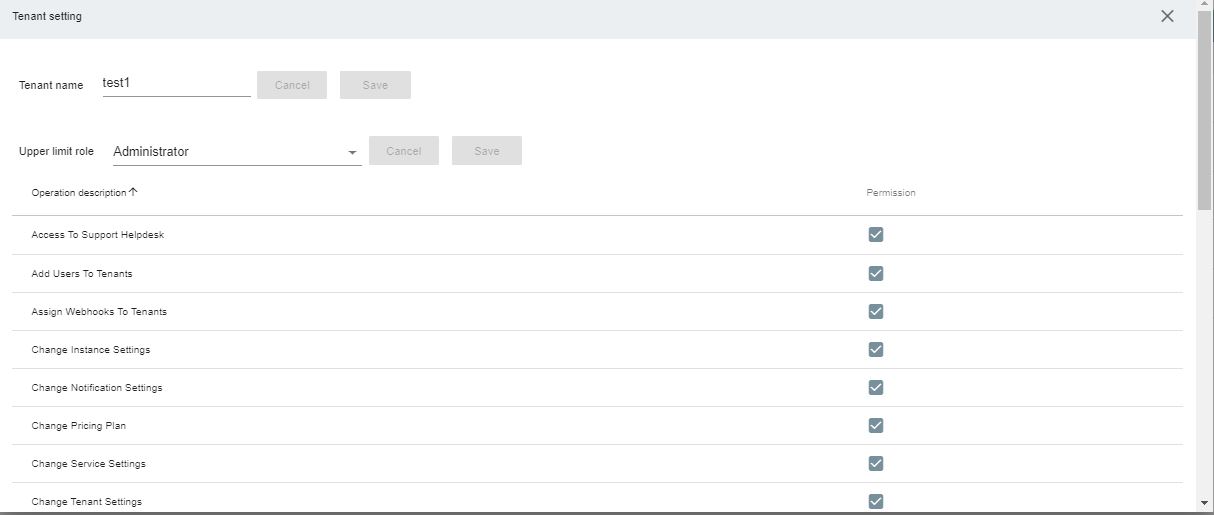
On the tenant setting page, you can perform the following operations:
- Change the tenant name
- Configure Permission for each operation
- Configure Upper limit Role allowed for tenant users
Tenant screen
Click the each tenant row to open the tenant setting page.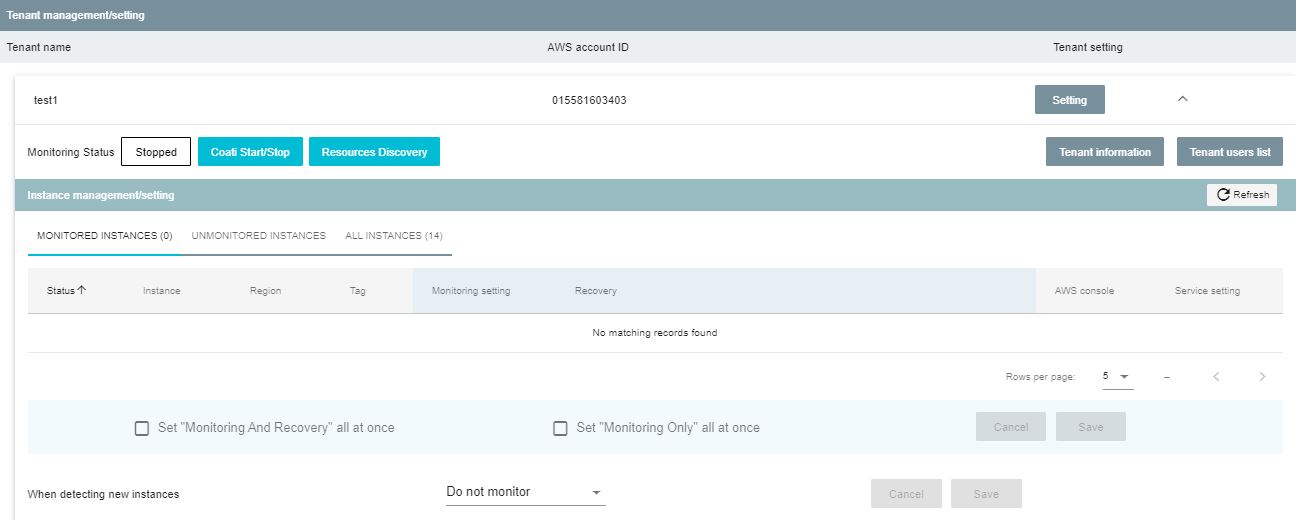
The details that you can set and view are the same as those of the Tenant Dashboard.
Comments
0 comments
Article is closed for comments.